1. Accounts creation
After logging in with the credentials left by our technician, by clicking this icon  you will find the user manual with all the information of the program.
PhoneLog Browser allows the creation of different accounts despite the amount of licenses available. You can create all the necessary accounts, but competing users, who can work simultaneously, depend on the amount of licenses acquired.
Users can access their account using a username and password.
Each account can be defined by one or more roles. We have created 3 types of roles:
- the role of Admin is intended for the person in charge of the management of the license and program. This role can be assigned to more than one account.
- the role of Investigator, usually, unless otherwise specified, is assigned by default to all accounts. This role in fact allows the use of all the features from case creation, analysis and results export.
- the role of LogAdmin is intended only for accounts that need to verify the activity logs that other accounts run with PhoneLog Browser.
A single account can have all three roles, two or only one. According to the roles assigned it is possible to access the dedicated area available on the top right of the interface.
Entering the Admin area  it is possible to star by creating the accounts for the users that are going to work with PhoneLog.
1. Users -> Add new record -> Enter the data of interest (attention Email will be the account username of the operator you are creating) -> save.
2. When you save the user you will be referred to the main list of users and you will need to enable the user and then modify the data: 
3. Set a password by clicking “Change password” to be delivered to the user. The user, after the first access can change the password delivered.
4. Define the role of the account. Please note, by default is assigned the role of Investigator. But you can also add to each account the role of Admin and/or Logadmin. We do not recommend adding these roles to all accounts, and it would be appropriate that these roles remain only to the people in charge of the management of the program and the license.
4. Define the role of the account. Please note, by default is assigned the role of Investigator. But you can also add to each account the role of Admin and/or Logadmin. We do not recommend adding these roles to all accounts, and it would be appropriate that these roles remain only to the people in charge of the management of the program and the license.

2. Cartography
In not already done during the installation, create an account on MapBox obtain your API key and apply it in Maps -> Cartography dedicated area, as displayed below:

Please note, if you need to set up the offline maps please refer to the dedicated area in the this guide: OFFLINE Maps
3. Cell towers lists import
If not done during the installation, you can import the cell tower list of every telephone operator in the “Cell Service” area. This will allow users to geo locate the cells towers present in the phone records without importing every time the cell list for each case. Moreover, this will allow to create an history of the cell towers positions and consequentely, the automatic geolocation of the cells, according to the reference period. It is therefore recommended to import the cell lists whenever there are updated lists.
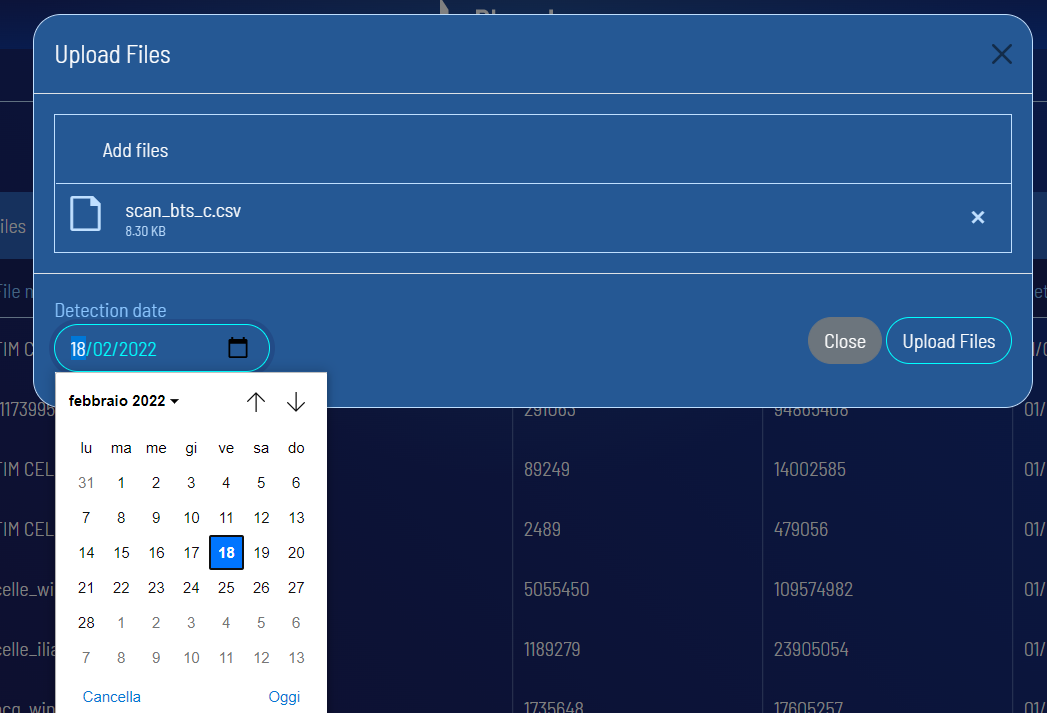
From the Cell Service area -> imported files -> import files

PLEASE NOTE: before proceeding with the cell list import, in this window add the refence period. This action will help when you geolocate the cell towers in your cases.
Once imported, you will see the file in the list (written in white). If the file is not recognized (orange icon and message) contact [email protected] to create the importer for the unrecognized file.
 Once uploaded all cell tower list files go to Cell
Once you have uploaded all your cell list files move to Cell Service -> Search Table to create a new search table.
This operation can take a while.

4. Geolocation services
The program allows you to customize geolocation services. These services can be used by operators within their own cases to calculate the position of the cells in case of missing data.
From the Cartography -> Geolocation Services area: organize by dragging the services available according to your preferences, we recommend to set the services as shown below. This configuration allows you to use as a first geolocation service the internal database data (data available in the phone records) and as a second option, in case the first fails, to use the data of the Cell Service (set to point 3. above).

To use the other services you need to set the API keys in the dedicated area: Maps -> Api Keys.